Starting your garden seeds indoors is simply FUN. It means Spring is almost here. And, it is almost magical to see those green seedling emerge from the soil. Planting many seeds requires organization and we have three tools you need for seed starting 2016.
Three tools you can use:
Tool #1 Bleach
Your seedling trays and pots need to be sterilized. You do not want to start the season with trays contaminated with fungal spores. Simply mix 1 part bleach to 9 parts water soak your pots for a minimum of ten minutes. Rinse well and you are ready!
Tool #2 Masking Tape
When planting many trays of seeds it is easy to forget what seeds went in which tray. If you label on the clear tray tops you may accidentally remove the top and replace it differently – labeling is lost.
A great way to label your plants is to use masking tape on the seed tray side. Using a sharpie marker write your plant names and dates. The masking tape stays secure on the tray and the sharpie marker shouldn’t fade. When the seedlings are ready to transplant the tape is easy to remove. It can’t get much simpler.
Labeling your seeds is very important. Masking tapes and sharpies make this job easy.
Tool #3 Plastic Tweezers
Plastic tweezers are available from educational science stores.
Handling small seeds is tricky. Using your fingers to pick one seed from a group is a challenge. Plastic tweezers are very handy for moving those seeds. They aren’t as dangerous as the very pointy metal ones and can be used by students. They are easily purchased through a educational science website.
These plastic tweezers are not as dangerous as the metal ones.
If you need more information on indoor seed starting see Starting Plants from Seeds for the Home Gardener or contact your UGA Extension agent. He/she has loads of experience and may be having a seed starting class.
Because of real concerns about our pollinator population the Environmental Protection Agency (EPA) asked each state to develop a customized pollinator protection plan with recommendations on improving pollinator health. This is not a regulatory document but just guidelines to help our pollinators.
Georgia’s plan is finished! Protecting Georgia’s Pollinators (PGP) was developed as a joint effort between UGA’s Department of Entomology and the Georgia Department of Agriculture. The author committee is made up of Jennifer Berry, Kris Braman, Keith Delaplane, Mike Evans, Philip Roberts, and Alton Sparks. Those of you who are beekeepers may recognize several of these names as people heavily involved in pollinator research.
The draft of the plan was sent to over 35 groups across the state for their input – Georgia Beekeepers Association, Georgia Fruit and Vegetable Growers Association, the Peach Commission, the Blueberry Commission to name a few. The result is a plan that has a role for all of Georgia’s citizens.
As community and school gardeners we have a vested interest in pollinator health. More pollinators means more food from our gardens. Not to mention the beauty of enjoying the insects at work.
Guidelines from the pollinator plan that we can garden by include:
If possible leave areas of your property permanently undisturbed for soil-nesting bees. Sun-drenched patches of bare soil, roadsides, ditch banks, and woodland edges are prime bee habitats.
Dedicate pollinator habitat spaces in your garden.UGA’s Pollinator Spaces Project has many resources to help with this. Bees need a season-long unbroken succession of bloom. Many plant species bloom in the spring. Remember to plant plants to bloom in mid- to late-summer including Vitex, sages, and sunflowers. Your local UGA Extension office will have information on what pollinator plants grow well in your area.
Pollinator spaces are useful and beautiful!
Know the beekeepers in your area. If your garden has a bee hive you want to be very careful about pesticide application and you will want to review in detail the section on pesticide users in the plan.
Bee hives can be located in urban areas
Consider increasing bee nesting sites by providing bee homes. These consist of solid wood pre-drilled with 1/4 to 1/2 inch holes that are at least 3-inches deep. It is important that the tunnels terminate in dead-ends. These are easy to create and a nice addition to any garden.
A easily constructed bee home – photo from PGP
Educate your gardeners about insect behavior. For example, the flight and nesting behavior of certain solitary bees happens in bursts of extreme activity. In the spring or summer you may see a large number of bees flying out of tunnels in the grass over your garden all at once. These are solitary bees and they are gentle, and their sting risk is extremely low! Enjoy watching them!
Digger Bee Nests
If you think insects are a problem in your garden take steps to correctly identify the insects and determine, with the help of your UGA Cooperative Extension Agent, if remedial action is necessary.
If your garden is located in a park or other public space that is maintained by local landscape crews, make sure that if they need to apply insecticide for turf pests that they mow the grass immediately before applying the pesticide. The mowing will get rid of weed flowers that may attract bees.
Clover, a bee favorite, is often found in lawns.
Follow all pesticide label directions and precautionary statements. THIS IS THE LAW. EPA is now requiring a “Protection of Pollinators” advisory box on certain pesticides labels. Look for the bee hazard icon and instructions for protecting bees and other pollinators.
Bee Hazard logo – photo from PGP
Take some time to look at Protecting Georgia’s Pollinators and you will see we all have a role to play. If you need any information about the plan or protecting pollinators contact your local UGA Cooperative Extension Agent.
Have you thought about the best way to use signs in your Georgia community or school garden? Gardeners often use small signs as plant labels but larger signs can be just as useful. They can be an important way to tie your garden together.
A creative, welcoming sign at the entrance can tell who you are:
SCAD in Savannah
Since gardeners don’t always work at the same time, signs can be a great way to communicate between gardeners:
From Cherokee County Senior Community Garden
More permanent signs can hold announcements, maps and other documents.
Green Meadows Community Garden
They can be a great way to tell the story of your garden:
From Blue Heron Community Garden
And, they can be instructional for beginning gardeners:
From Food Well’s Healthy Soil, Healthy Life Initiative
Signs can also be a way to make sure all gardeners know the rules:
From Tobie Grant Manor Community Garden
You can brag on your certifications. Many certification programs have an option to purchase a weatherproof sign:
For school gardens, signs can encourage teachers to use the garden by giving them basic lesson facts:
Due West Elementary School’s Math Garden Sign
Or they can be inspirational:
Ford Elementary School
Signs for the garden should be weatherproof, easily readable, and securely attached to a post or a building. The next time you are at a large botanical garden like the Atlanta Botanical Garden or the State Botanical Garden of Georgia notice their signs and labels. You will be inspired.
One of the beautiful things about all types of gardens is the opportunity to see wildlife – birds, butterflies, bats, beetles, lizards – all types of wildlife. A garden is truly an outdoor classroom. Many school and community gardeners work towards having their gardens become certified wildlife habitats.
Sadly, sometimes school or community vegetable gardens get blamed for harboring undesirable wildlife, like rodents. This can be a real problem for the gardeners.
Is the vegetable garden really the problem?
Wildlife need food, water, and shelter. Those things can be found in a garden, near a dumpster, or in buildings. A large population of rodents need a large amount of food and a few seeds from end-of-the-season garden sunflowers will simply not sustain a large population of rodents.
If your garden is being blamed for a rodent problem, determine where the rodents coming from and what is attracting them. Could it be leftover food from a playground or picnic area? Are dumpsters being improperly used? Has something recently changed, like nearby land being cleared that would displace wildlife and send them into your area? Are bird feeders spilling an excessive amount of feed? Chances are, a vegetable garden may not be the problem at all.
Setting out traps may help you all get a handle on the problem. You should be able to see just how many, and what type, of rodents you are dealing with. For example, voles eat the roots of any type of plants not just the roots of vegetables. If it is just a few rodents you can just trap and relocate them.
Educate community leaders about your garden
If a community leader or school official is concerned about your garden and rodents there are several steps you can take:
First, demonstrate that you are using proper sanitation in your garden. You are not leaving weed piles and overgrown plots for mice to hide in. You are harvesting the vegetables just as they become ripe and not letting overripe vegetable stay in the garden.
If you have a compost pile show that you are not adding things that attract rodents like whole eggs, meats, or dairy products. You are actively maintaining the compost bins/piles.
Educate the people around you that the soil and watering issues are no different in a vegetable garden than what is found around the traditional landscape plants located elsewhere on the property.
Maintain good relationships with your community leaders or school administrators. When they see what a positive impact your garden is having eliminating it would be unthinkable.
As a bonus, to assist with a property-wide rodent problem consider adding owl nesting boxes to attract these rodent predators. This would also add another wildlife dimension to your property!
An overall rodent problem is not a reason to eliminate a well maintained school or community garden. For more information see the UGA publication Resolving Human-Nuisance Wildlife Conflicts. Or, contact your local UGA Extension agent. Thanks to the many UGA Extension agents who assisted in this blog post!
It is gift-giving season and we want to share a useful gift that is easy to construct with scrap wood.
We have mentioned using a tamper in several other blog posts. It is a very useful tool to ensure good seed-to-soil contact when working with small seeds like spinach, lettuce, carrots, and collards. The weight of the tamper is all that is needed to compress the soil slightly.
I was first introduced to this tool by Jim Hall, a Cherokee County Master Gardener. He guaranteed a higher germination rate of small seeds by just using the tamper!
Building Instructions
The tamper is easy to construct and makes a great gift for a gardening friend or for yourself! You will need a 2X4 wood piece, a 1X2 (or 2X2) wood piece, and a wood screw.
Step One: Measure and cut 1 foot off of a 2X4. This will be the base.
Step Two: Measure and cut 4 feet off of a 1X2 (or a 2X2). This is the handle.
Step Three: Choose a wood screw that is at least three inches long so it will go through the 2X4 piece and into your 1X2.
Step Four: Drill a pilot hole in the middle of the 2X4.
And into the end of the 1X2.
Step Five: Using your wood screw attach the pieces:
Your final product:
The tamper can be creatively painted or left bare. Using the tool is easy. Place small seeds on top of garden soil. Sprinkle about 1/4th inch of soil on top of the seeds. Gently tamp the soil with tool. The weight of the tamper is enough pressure to ensure seed-to-soil contact. No need to press down.
December 5th is World Soil Day, a fitting end to 2015’s International Year of Soil.
The 68th UN General Assembly declared 2015 the International Year of Soils and the Food and Agriculture Organization of the United Nations implemented the program, within the framework of the Global Soil Partnership and in collaboration with Governments and the secretariat of the United Nations Convention to Combat Desertification.
The goal of the project was to increase awareness and understanding of the importance of soil for food security and essential ecosystem functions. Your local UGA Cooperative Extension office probably offered a class on soil health or composting during the year. There were several offered in the metro Atlanta, Georgia area.
Healthy Soil Resources
Want to challenge yourself on soil trivia? Take the soil quiz from the International Year of Soils website. Want more information on composting and healthy soil? See UGA’s Composing and Mulching publication or visit Food Well Alliance’s healthy soil resources.
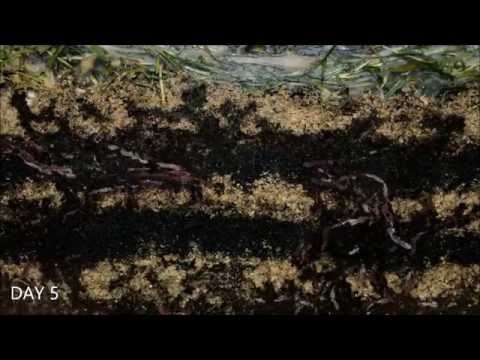
Finally, Gregor Skoberne created this YouTube video on worms making compost. This video will make you really appreciate the process of making compost and healthy soil.
On this day we gardeners are thankful. We are thankful for rain and for soil that is rich with earthworms. We are thankful for watching the honey bees and butterflies that visit our gardens. They lower our blood pressure and pollinate our crops.
We are thankful that we live in an area that allows us to grow food almost all year long. We are thankful for the first red, juicy tomato in the summer and we are thankful for that first hard frost so we can put our summer garden to rest. We are thankful for those first pea seedlings that push through the soil in the springtime.
We are thankful for other gardeners.
Wishing you and your families a very Happy Thanksgiving!
Thanksgiving dinner is about much more than the turkey – it is also about the pie! In time for Thanksgiving baking we are fortunate to have Lauren Bolden of Woodstock, Georgia’s Pie Bar share a family sweet potato pie recipe with us.
The Pie Bar is a cute shop in downtown Woodstock that sells wonderful pies. It has been open just since September but it is already an asset to the Woodstock community.
Lauren has perfected her pie crust!
Lauren grew up making pies using frozen pie dough. A few years ago she decided to learn how to make homemade crust and after much experimentation she has it perfected!
She and her husband, Cody, began selling pies at area Farmers Markets. There they built a client base and met many of the local farmers. They took a big leap in starting their own pie shop earlier this year. Insisting on using local ingredients when they are available, Lauren enjoys building relationships with farmers. Peaches, pecans, apples and blueberries are all locally grown.
Lauren and Cody Bolden
Like all good recipes, the quality of the finished dish depends on your ingredients. For good sweet potato pies you MUST start with quality, cured sweet potatoes. Like the ones you have grown!
Bolden Family Sweet Potato Pie
Makes two pies
– 2 All Butter Pie Crusts (par-baked)
– 3 medium sweet potatoes (roasted in oven)
– 1 can evaporated milk (5oz can)
– 1 cup granulated sugar
– 2 large eggs
– 8 tbs melted butter
– 1/2 tsp fresh ground nutmeg
– 1 tsp cinnamon
– 1 tsp vanilla
Wash and prick (with a fork) sweet potatoes. Roast potatoes at 400F for 1 hour, or until soft. Cool potatoes, remove skin. Pulse sweet potatoes in blender or food processor until smooth/pureed.
Reduce oven temperature to 350 F.
Place pie shell on baking sheet and fill with parchment paper. Add uncooked beans or pie weights to shells and bake for approximately 7-10 minutes. Remove parchment paper filled with beans/weights; cool shells slightly. You do not want to cook the shells completely. If shell begins to puff up, use a fork to prick slightly.
Combine pureed sweet potatoes, sugar, melted butter, nutmeg, cinnamon, and vanilla. Once combined, add evaporated milk and eggs. Whisk until smooth.
Fill par-baked pie shell with sweet potato filling and return to oven for 35-40 minutes; rotating 180 degrees halfway through. Use a toothpick to check the center of the pie; it should come out clean. Use the back of a teaspoon to lift the edge of the pie shell to check to see if your crust is complete.
Cool pie on the counter for up to 2 hours. Keep pie refrigerated up to 4 days.
We like to top our sweet potato pie with our homemade cinnamon whipped cream. That recipe is below:
Whip heavy whipping cream in stand mixer (or hand mixer) until you notice a slight trail. Add cinnamon, then confectioners sugar one TBS at a time as you continue to mix. Mix until whipped and stands on its own. Store in the refrigerator.
A Sweet Potato Tradition
Recently Grade 6 students of the Waldorf School of Atlanta harvested 960 pounds of sweet potatoes with the help of the Atlanta Community Food Bank’s Fred Conrad. This has become a grand tradition for the school; it is the 5th year of the harvest.
The video of the harvest shows the importance of having young people involved in growing food. As you watch, look at the facial expressions of the students. Thank you Lindsey Lingenfelter for sharing the video. Nine hundred and sixty pounds of sweet potatoes will make alot of pie!
Recently I was privileged to visit the Due West Elementary School Garden in Cobb County, Georgia. The garden program is coordinated by Ms. Rita Fullick, a UGA Extension Cobb Master Gardener. She has been working with the program for four years and her enthusiasm is evident.
Due West Elementary School currently has 640 students. The school garden is spread out around the property. There is a sensory garden for the k-1st graders, a garden devoted to the importance of water, a pollinator garden, a wildlife habitat garden, and vegetable garden plots.
The Math Garden
The math garden is unusual. The beds were created in geometric shapes and professional grade rulers line the beds. Metric and English measurements are both included.
In the Math Garden the learning can be endless. Using a scale to measure soil weight or children’s weight. How much we can carry?
How far apart do we plant? How Deep … both in metric and standard measurements. How high is it growing? How many flowers or vegetables are planted?
Sound like math to you? Counting the number of weeds pulled and the number of rolly pollys collected is understanding the relationship between numbers and quantities. This connects counting to real life.
Did I mention that as the children are working and learning in the garden they are playing in dirt?
There is also an outdoor auditorium. The entire school property is a wonderful space for outdoor learning. The date I visited the students were getting ready for a soil experiment.
Community Support
Ms. Rita Fullick, A Cobb County Master Gardener loves her work in the Due West Garden
The principal, Ms. Peggy Fleming, feels that every student should garden. Ms. Jan Divelbliss, the school science specialist, is also on board with the school garden. The school support is the biggest part of the school garden’s success. Parent involvement is also crucial. Ms. Fullick has a group of involved parents she calls Garden Angels. In addition to assisting during the school year, Garden Angel families volunteer to help keep the gardens in order during the summer months when school is out.
Ms. Fullick gave two pieces of advice she says could help any school garden. First, engage community partners. Don’t be afraid to ask local businesses to be a part of the garden. Visit the businesses in person and don’t be shy about asking for donations. Also, find local experts to provide programs for the students. A representative from the local water department helped the students in developing a rain barrel system.
Secondly, provide signage for the teachers. Some teachers are intimidated with the garden subjects and teaching outdoors. Having signage to guide them encourages more teachers to actually use the garden.
We thank Ms. Fullick for the tour and for the words of wisdom. Due West Elementary is fortunate to have her and we wish them a wonderful school year!
The old ways are not always the best ways. Recently a relative of B. B. Higgins of Griffin, Georgia found a bulletin written by Mr. Higgins who was a botanist at the Georgia Experiment Station. The following was written in January of 1935:
Soil For the Pepper Seedbed
Where clean woods soil is available it is advisable to use new soil for the pepper seedbed each year. When it is not available, the old soil may be used several years provided it is sterilized each year before the seed is planted.
If high pressure steam is available, it is the cheapest and most effective means of doing this. An inverted pan of sheet iron may be made to fit inside the bed walls and attached to the boiler by means of rubber hose. The seam should be run in at 80 to 100 pounds pressure for about an hour, or until a potato placed 12 inches below the surface is thoroughly cooked. The pan may then be moved to another section until the entire bed is sterilized.
The soil may be partially sterilized quite satisfactorily with formaldehyde solution (known commercially as “Formalin”). One gallon of commercial formalin is sufficient for 100 square feet of soil.
First spade up and pulverize the soil. Add 1 gallon of formalin to 99 gallons of water and apply evenly over the soil with a sprinkling can, at least 1/2 gallon per square foot. The soil should then be covered with tarpaulins or other heavy cloth. Two or three layers of old sacks is quite satisfactory. This cover should remain in place 2 to 3 days. It should then be removed to allow the fumes to escape.
As soon as the soil is dry enough it should be spaded over and aired out thoroughly. The seed should not be planted until at least 2 weeks after treatment.
The formalin treatment will not kill all nematodes. If the root-knot nematode is present the soil should be steam sterilized, or the bed over to a new location.
None of us in 2015 would consider using formalin in our garden and steam treatment has long been replaced by the use of heavy black plastic to heat our soils – much safer to apply than steam. Still, doesn’t this make for a minute or two of interesting reading? Remember, this method was promoted in the 1930s.
Reviewing this bulletin emphasizes how important it is to rely on current research-based information. In this age of “the university of Google” and Wikipedia, it is extremely easy to get information that isn’t research-based, is out of date, or is just wrong. With today’s wonderful publishing tools anyone can make an official looking publication. The lesson – know your sources. Looking for information put out from major universities and sources you can trust. Don’t entrust the health of your garden to incorrect information!

 Your seedling trays and pots need to be sterilized. You do not want to start the season with trays contaminated with fungal spores. Simply mix 1 part bleach to 9 parts water soak your pots for a minimum of ten minutes. Rinse well and you are ready!
 When planting many trays of seeds it is easy to forget what seeds went in which tray. If you label on the clear tray tops you may accidentally remove the top and replace it differently – labeling is lost.


 not leaving weed piles and overgrown plots for mice to hide in. You are harvesting the vegetables just as they become ripe and not letting overripe vegetable stay in the garden.